

How To Make Screen Print Transfers For Heat Press
So yous bought a heat press and want to get started using it to decorate t-shirts. But where can you get cool designs to press onto the tees? You tin buy custom-fabricated or prepare-made transfers, but y'all tin likewise hands acquire how to make your own screenprint transfers!
Making a screen print transfer requires printing a design onto a special kind of release or transfer paper. Depending on the type of screen print transfer, a diverseness of inks and paper types will piece of work best. Sublimation transfers use disperse dye ink, screenprints use plastisol ink, and DTF transfers use pigment inks.
In this article, you will learn how screenprint transfers work. Y'all'll find out what supplies and equipment you lot need to make these transfers. Finally, you lot'll discover six methods for making your own screenprint transfers!
Quick Navigation
- What is a Screen Print Transfer?
- What Are Screen Transfers Made Of?
- How to Make Your Own Screen Print Transfers: 6 Methods
- 1. Screen Print/Silk Screening
- two. Plastisol Transfer
- iii. Full-Colour Transfers
- 4. Iron-On Transfers
- 5. Cricut Transfers
- vi. DTF Transfer
- How Long Do Screen Impress Transfers Last?
- Can You Press Screen Print Transfers?
- What Printer Do I Need to Make Transfers?
- What is the Best Transfer Paper for Screen Printing?
- Should Y'all Brand Your Own Screen Impress Transfers?
- How to Make Screen Print Transfers to Sell
- Conclusion
What is a Screen Print Transfer?
Screenprint transfers are designs in reverse printed onto a kind of release or transfer paper. After placing the newspaper ink side down on the receiving surface, such as a t-shirt, an application of high oestrus causes the ink to transfer from the paper to the fabric.
You tin can apply several different kinds of screenprint transfers. One of the most popular is to screen print a design onto transfer paper using plastisol ink. Another popular method of creating this print transfer is to use disperse dyes to create a sublimation print.
In well-nigh ways, you create a print transfer exactly as you would design and create the print if you fabricated it straight onto the t-shirt or other surface. Simply the do good of using a transfer is that you lot can make a lot of that one pattern at in one case and save them for later use. Yous can also sell them to apply the transfer to whatever surface they want after on!
What Are Screen Transfers Made Of?
Screen transfers are fabricated out of a printed design on transfer or release newspaper. The type of paper and ink used is crucial as it determines what kind of concluding print you lot will get and how well the design will transfer from the paper to the final surface. Of course, the quality of your design can also make a large difference.
When making a screen transfer, you begin with the design. You can create a design in many means, ranging from using professional graphic blueprint software to cutting out a stencil on a Cricut to simply mitt-painting a design. Using a computer design program gives you lot the easiest and nigh accurate way to create lettering, logos, or edit images.
Once you take the blueprint, y'all volition employ several different techniques to print it onto your transfer paper–yous can find more than details on each process in the next section of this article!
But every type of transfer needs two things during this process: transfer paper and ink. Let's take a quick look at unlike types of paper and ink.
Transfer paper typically comes in either a hot or cold peel. Hot peel ways that you lot can safely remove the transfer paper after using heat to attach the ink to the fabric correct away. Cold pare means that you need to permit everything to cool down before removing the paper.
- For screenprint transfers, your all-time selection of newspaper is hot pare plastisol transfer paper. You can find dozens of different brands selling this. The cardinal is to expect for plastisol transfer paper, not inkjet or sublimation paper.
- For sublimation transfers, you will desire to make sure you notice sublimation transfer newspaper. You can also notice this option in both hot and common cold peel.
- Finally, for DTF transfer, you will desire to use DTF transfer sheets that look more than similar a sparse film.
Another cardinal factor in creating a print transfer is using the right printer and ink.
- For screenprint transfers, you can use a simple mesh screen and plastisol ink or a more professional printer that comes with racks to hold screens in various colors. Screenprints are made one colour at a time, so y'all demand a screen for each color yous plan to employ.
- For sublimation transfers, yous can use either a special sublimation printer or an inkjet printer with sublimation ink installed. You print these designs out but as you would impress onto regular copy paper. Sublimation ink is a kind of disperse dye that bonds with synthetic fabrics like polyester when exposed to heat.
- For DTF or DTG transfers, you lot do need a special DTG printer. It uses water-based ink that soaks beyond the surface of the fabric to form permanent prints.
How to Make Your Own Screen Impress Transfers: 6 Methods
Yous tin can use various techniques to create a print transfer, including using mesh screens and by-manus screenprinting, using computer graphics and sublimation dyes, or using a Cricut with several different types of ink.
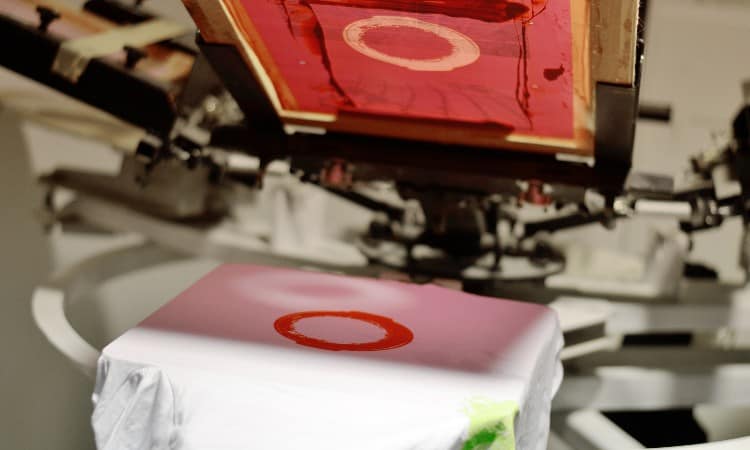
1. Screen Print/Silk Screening
You make a screen print or plastisol rut transfer by pressing ink through a stencil on a screen. Setting upwards the screens to create a screen print transfer takes some work, simply the cracking thing well-nigh this procedure is that y'all can utilize the tools and set up to make dozens or hundreds of transfer sheets! Y'all can then let the transfer sheets dry and apply them to t-shirts much afterward on.
You make screenprint transfer sheets in much the same way as you make any screen print pattern, with a few minor modifications. The biggest difference is that you will want to add an adhesion powder that helps the plastisol ink stick to the transfer paper.
- Make a mirrored pattern using a Cricut, a hand-cutting stencil, or a graphic blueprint software programme. For really professional-grade screen print transfers, you lot will probably want to make a stencil using a light emulsion process on your screen (yous tin find details on this in the next section). For a simpler pattern, you lot tin can brand a concrete stencil using your Cricut or a manus-cut piece of cardstock.
- You need the blueprint stencil in reverse because you will flip the transfer upside down to apply information technology to your shirt!
- The easiest screenprint transfers utilise merely one color because yous have to layer 1 colour at a time using separate screens and stencils for this kind of printing.
- Secure the stencil to your mesh screen. For transfer prints, you typically want a fine mesh screen of about 150 thin thread mesh.
- Next, you lot can either grit the transfer newspaper with adhesion powder or relieve this stride and dust the finished impress with adhesion powder.
- Spread the plastisol ink over the stencil using an bending of 75°. Make certain y'all use a thin, smoothen layer of ink to non leak nether the stencil.
- If you have a professional person printing, set up the transfer paper beneath the screen and press them together. If you have obviously screens that you have set upwards by paw, carefully align the inked screen over the paper.
- Remove the stencil and flash cure the transfer paper using 180 to 260℉.
In some cases, you may want to endeavor mixing the agglutinative pulverization into the plastisol ink rather than dusting the paper with the powder. This creates a thicker ink with a raised design on the transfer newspaper.
2. Plastisol Transfer
A plastisol transfer is a piece of transfer paper with a screen printed design on it. You use a rut press to transfer the plastisol ink to the surface of a fabric t-shirt. Y'all can employ the basic steps in the previous department to create a simple, one-color plastisol transfer. If yous would similar to make a more avant-garde type of transfer, follow these steps to create a more circuitous blueprint using an emulsion stencil.
- In a dark room, follow the instructions on the package to mix up the sensitizer and photograph emulsion in the proper quantities. Typically, y'all will also add a certain amount of water to this mixture.
- With the screen facing upwardly, pour your emulsion mixture across the lesser edge of the screen, and then use a squeegee to elevate information technology in a smooth coating over the surface of the whole screen. Plow the screen then that y'all can see the inside of the screen and do this again, plumbing fixtures your duster inside the wooden slats of the frame to spread the emulsion.
- Let the screen dry out totally in a dry, dark place for at to the lowest degree eight hours.
- Next, you lot demand to prep your image for the stencil screen. You can exercise simple designs using a Cricut or whatsoever other cut-out, but for avant-garde piece of work, y'all will desire a design program that offers color separation. You lot can make a separate stencil for each colour in the paradigm and create a screen for each color.
- Print your design onto a transparency sail. Or print one sheet for each color layer if you plan to make a multi-colored print transfer.
- With your pattern ready and the emulsion screen dry, you can set up the lite exposure. To do this, set upwardly a brilliant bulb, at to the lowest degree 150W, inside a metal reflector. Place this light a foot away from where y'all plan to place the screen.
- Place the transparency upside down on the backside of the screen and then that it looks correct from the inside of the screen. Put a piece of glass or acrylic over the transparency (the glass insert from a big picture show frame works well).
- Turn on the light and expose the screen for 45 minutes to an hour.
- Finally, have the screen to a sink and spray common cold water over it. Yous should run into your design start to prove up on the screen!
- Let the rinsed screen dry totally before using it to screenprint with plastisol ink onto transfer sheets.
- If you made a multi-colored design, you would need to repeat all of the steps for each color layer/stencil screen you make.
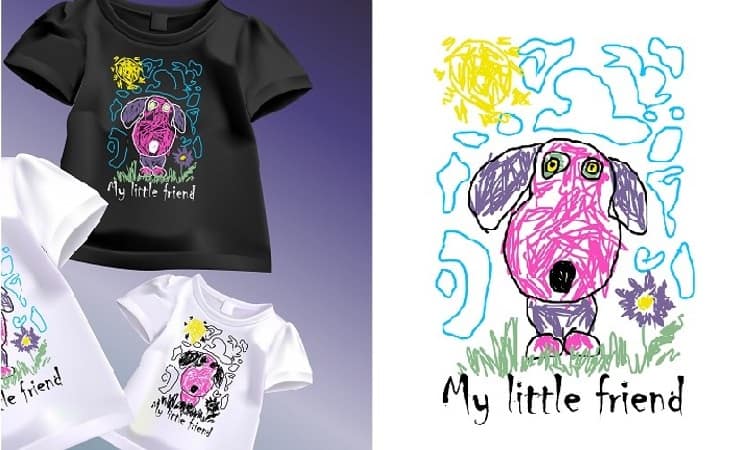
3. Full-Color Transfers
The easiest ways to create full-color transfers are to use a sublimation printer or a DTG printer. Both processes come with some pros and cons. Yous tin can create full-color images using screen press, but but past using color-separating software and then creating a light emulsion stencil for each of the colors.
The biggest advantage to choosing a sublimation transfer for a full-color design is that you can print out colors using the digital CMYK model using a sublimation printer. Your printer volition mix up all the colors and shades to recreate a photo for yous if yous use sublimation printing!
You can hands utilize sublimation transfers to any synthetic fabric or a hard surface treated with a synthetic coating. Plus, information technology's pretty easy to create full-color sublimation transfer prints.
The biggest downside to sublimation transfers is that they volition only work on polyester t-shirts. You cannot use them on cotton fiber. Y'all also need to own a sublimation printer. You have to brand sure you use sublimation transfer paper and the correct sublimation dyes that tin evaporate and bond with polyester fibers.
DTG printers cost a lot, and unfortunately, they remain the best way to print DTG/DTF transfers. These printers use a water-soluble ink designed to soak into the fabric rather than just sitting on its surface.
If you take a professional set up-up or plan to launch a small business, you can hands utilise a DTG printer to print full-color designs onto transfer paper.
Follow these steps to create a sublimation transfer print:
- Begin by prepping a digital design. Yous can utilize a photo, lettering, or annihilation else you want! Make certain y'all either mirror the image or flip it horizontally before printing.
- Put the sublimation transfer paper into the printer with the papery side facing up and the writing side facing down.
- Impress out your design. It will look paler than your digital design but don't worry nigh that!
- And that's it! You do need a estrus press to apply the transfer to a t-shirt afterward on, but making the actual sublimation transfer requires hardly whatever piece of work!
4. Iron-On Transfers
Atomic number 26-on transfers work quite differently from other types of impress transfers considering you lot permanently adhere the transfer itself to the shirt using a estrus-activated agglutinative on its backing. Different all other transfers, y'all don't utilize heat to use the ink so skin away the transfer newspaper!
The large do good of this kind of transfer is that it provides a backing behind the ink. This means that y'all can utilize dark-colored t-shirts without worrying about the colors fading into the shirt! You do not take to mirror your pattern when you print information technology onto an iron-on transfer because you will use the iron-on ink side facing up.
You can use plastisol inks and screen-printing methods to create designs on iron-on transfers. You can also utilize a DTG printer on iron-on transfers. You tin can also sublimate onto sure types of heat transfer vinyl, but you lot have to make sure the HTV contains polyester for that process to work.
v. Cricut Transfers
You can use a Cricut to make a stencil to use during the screen press process to make heat transfer designs. You can apply any electronic cutting device, merely the Cricut make remains one of the most popular out there and comes with handy blueprint software called Design Space that you can utilise to make and mirror your stencil design.
To make a screen impress transfer using a Cricut:
- Commencement in Pattern Space by creating a digital paradigm that you want to impress. Typically, you will use just 1 color as it takes a lot of work to make multiple stencils for separate screen print colors.
- Mirror the design so that information technology will cut out in contrary. Design Infinite offers a handy "mirror" button that volition do this for you lot.
- Send the file to your Cricut and cut out the design using regular adhesive vinyl.
- Before you skin the vinyl off the cutting mat, weed away the positive space of your pattern. Yous want to go along the negative space so that the ink tin fill in the bodily design later on!
- After the weeding, advisedly skin upward the vinyl stencil. Remove the adhesive backing and place it sticky-side down on your mesh screen. Employ your duster to smooth over the vinyl and make sure no air bubbling got stuck in it!
- You tin besides utilize transfer tape around the vinyl edges for extra security.
- From this betoken on, you use your stencil-prepared screen just as you would for any screen print process! You will smooth plastisol ink over the surface of the stencil using a squeegee, forcing the ink to go through your design and onto the transfer paper beneath.
6. DTF Transfer
DTF stands for direct-to-fabric or directly-to-film, just these transfers often get called DTG, or direct to garment, every bit well. This is a bit disruptive because when y'all print on a transfer, you aren't actually press directly to the garment! But the procedure of creating a DTG/DTF transfer works in pretty much the same way as using this printing method direct onto a t-shirt.
So, what is a DTF transfer? It's a sheet of transfer movie with a mirrored design printed onto it using a DTG printer. Y'all can apply the printed pattern to the final surface, such as a t-shirt, using a heat printing.
The swell thing about this process is that you tin can utilise this transfer motion picture onto many different types of surfaces, including cotton, polyester, and even leather!
Bated from the fact that yous need either a DTG or straight-to-film printer to make this kind of print transfer, it's a pretty simple process!
- Yous tin buy DTG film in either sheets or rolls. You will need to start by cutting out a slice that will fit your printer.
- Prep your digital blueprint. You can utilise full-color images such equally photos quite easily.
- Print out the image, then impress a white layer over top of this. If you have an bodily DTF printer, the software will exercise this for y'all all at once, so you lot do not have to print on the film twice.
- Adjacent, carefully sift hot cook powder for DTG transfers over the design while the ink remains damp. This agglutinative pulverisation will allow your transfer pic to stick to the material afterward.
- Cure the adhesive pulverisation and ink by using a heat printing at 350℉ for two minutes.
- Now you take a finished transfer flick! To adhere it to a garment, you volition use a rut printing set to 284℉ for fifteen minutes and then do a common cold skin past allowing the film to cool entirely before peeling it abroad.
How Long Exercise Screen Print Transfers Last?
Plastisol transfer prints can concluding for years so long every bit you lot store them in a cool, air-tight container. The ink will not degrade or fade over time under these conditions. You can use them at any point past applying a heat press to seal the ink onto the final surface.
To prolong the shelf life of your plastisol transfers, yous do need to keep them in something air-tight like large Ziploc numberless. You should also find an environs with cool, dry air rather than hot and humid air or clammy air.
As well, brand sure they do not sit directly nether vivid light, and definitely practice not go on them in direct sunlight!
Can Yous Printing Screen Print Transfers?
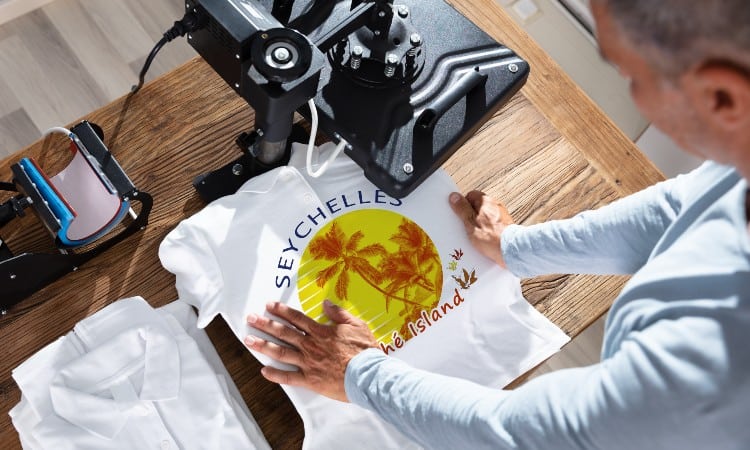
You lot can apply a heat press to seal the ink on a screen print transfer onto a shirt or other surface! To do this, follow these unproblematic steps:
- Turn on your heat-press and set the temperature to 325℉ to 350℉, depending on the instructions that come with the transfer sheet packaging.
- Apply the heat press to the shirt, where the design will get briefly to remove wrinkles or wet from the fabric.
- Set the transfer canvass ink-side downwards onto the textile.
- Apply the heat printing for five seconds.
- Hot-peel the transfer paper away with dandy intendance. If it does not come up away easily, utilize the oestrus press again for a couple of seconds.
This process works best with a professional or clamshell-fashion heat press. If you lot have a pocket-sized heat press, y'all will have to push button down on it during the v-second heat window to add necessary force per unit area.
What Printer Practise I Demand to Make Transfers?
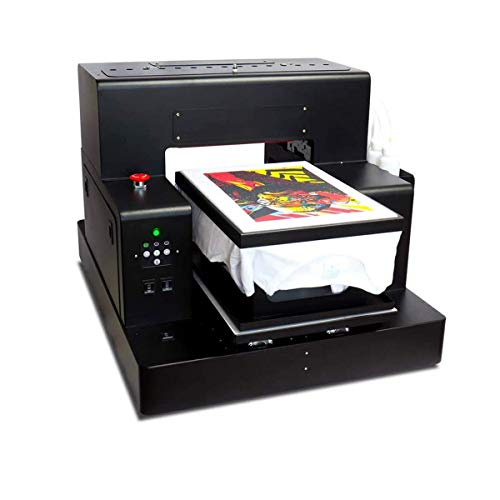 Yous tin use several unlike kinds of printers to brand transfers depending on the style of transfer impress you want.
For sublimation transfers that you want to employ on polyester, y'all volition need a sublimation printer. These practise not cost too much though the disperse dyes necessary for sublimation printing tin get pricey.
For screen press, you do not have to take a printer at all! You can work with mesh-covered screens that you build yourself if you prefer. But for a professional set-up, y'all volition desire to become a screen print printing with arms to hold multiple screens at once.
For DTF/DTG transfers, you will need a DTG printer. These practice price quite a lot. Virtually of the time, only professionals running large-scale businesses invest in this type of printer.
What is the All-time Transfer Newspaper for Screen Printing?
To create good screen printer transfers, y'all need to use plastisol transfer paper. You tin find many unlike brands selling this kind of transfer paper, such as Epson, Reich Supply, and Ryonet.
You can social club plastisol transfer paper online or find information technology in many craft stores. Sometimes role supply stores volition have information technology near the printers as well!
Go along in mind that inkjet transfer newspaper or other types of transfer paper like sublimation paper or DTF motion picture will not work for screen press.
Should You Brand Your Own Screen Print Transfers?
If you're trying to decide whether you lot should make your own screenprint transfers, print direct onto the garments, or society custom transfers, check out his helpful list of pros and cons!
Pros of making screen print transfers:
- You can make a lot of transfers and store them for later on utilise. This means that you tin have a pop design on paw if many customers request it at once.
- Also, storing transfers takes up a lot less infinite than storing folded t-shirts.
- You practice not accept to spend a lot of money on shirts, hats, or other blanks that could be wasted if no one wants that particular pattern.
Cons of making screenprint transfers:
- It takes a flake more time than direct printing onto the blank, as you have to repeat some steps.
- You have to know how to screenprint. If you have no experience in this arena, y'all may find information technology more cost-effective to custom order transfer prints and then simply apply them to blanks using a heat press.
- Yous practise not encounter the finished production until the point at which you attach the transfer to the blank. You could cease up with a mistake or error in the whole batch of screen impress transfers that you made earlier.
How to Make Screen Print Transfers to Sell
The fundamental difference between making screenprint transfers to sell and making them for your own apply is that y'all will generally want to replicate the same design in majority if you plan to sell the transfers.
One of the great things about selling impress transfers, rather than finished shirts, mugs, or baseball caps, is that your startup price will be much lower! Y'all simply accept to buy packs of transfer paper rather than buying bare t-shirts, hoodies, or hats.
Plus, depending on your print method, you may besides find it easy to use this method to offer custom work to customers. You can simply print the requested pattern onto a transfer paper and mail it to the customer. The client then uses a heat printing to adhere the design to the item of their option.
Conclusion
You can make your own screenprint transfers using a simple Cricut stencil on a screen or a fancy DTG printer on DTF picture! The basic concept of a impress transfer, whichever method you choose, is to utilize ink onto a transfer canvas. You lot tin can so save that sheet until you lot desire to use a heat printing to apply information technology to a blank t-shirt, hoodie, or some other surface.
Popular ways to create print transfers include creations plastisol transfers using traditional screen printing and light emulsion stencils or simple screen printing using a Cricut-cut stencil. Yous tin also create a sublimation print transfer by printing your design onto sublimation paper using a sublimation printer. The other super-popular type of print transfer requires a DTG printer and a special DTF pic.
Have you ever fabricated a impress transfer? What method did yous use? Leave a annotate below to let us know!
Source: https://silverbobbin.com/how-to-make-screen-print-transfers/
0 Response to "How To Make Screen Print Transfers For Heat Press"
Post a Comment